Tempura, Soba, and the Flu, I think.

There’s nothing like the light, crispy crunch of a perfect tempura batter, plus some awesome  caramelized vegetable soba noodles! Japan or bust!

I love just about every international cuisine out there. I say just about, because there are some I’ve never tried, like Ethiopian, Indo Chinese and Congolese, for example.  Of course there are what I call ‘International American’ because it’s common American eats even though its origins lie in the country it’s from (unlike”so-called Chinese” Chow Fun (Chow Mei Fun), Chow Mein, Chop Suey (Chop Sooy) etc) all three of which originated in America).

One of those international cuisines is Japanese, obviously sushi, but so so much more, from Katsu Don (chicken) to Nikujaga (stew) to Tonkatsu (pork), to my all time favorite, or let’s say must always order with the aforementioned other favorites aka tempura anything.  I also love all kinds of Asian noodles and noodle bowls, so this month’s challenge is manna extraordinaire, and boy am I going to eat goooood.

How to make the best tempura! From sweet potato to broccoli to onion to cauliflower, plus garlic soy soba noodles with caramelized vegetables and a tempura egg.To make the above noodle dish, toss cooked soba noodles with dressing from soba noodle-vegetable saute recipe, below. Top with a sliced medium, soft-boiled egg or tempura egg, sliced roasted red pepper and diced ham. pancetta or prosciutto.

Fast forward two weeks. I’m sick, so I’m not going to eat good. In fact, I made everything two days ago, and I still haven’t touched it. I was queasy photographing it all, so queasy that I couldn’t even get my post up because it would mean I have to look at it all again.  What started as a simple cold, has morphed into aches, pains, nausea, sore throat, and of course, the stuffy nose, turning my bedroom into a balled up kleenex ticker tape parade aftermath.  I just inserted this paragraph so you’d all understand why it took me three days past reveal day to get this post up.  Now I have to take a deep breath and try not to gag as I upload the photos.  I’m ticked off, I was really looking forward to eating this.  OK, back to me before I was sick, below.

How to make the best tempura! From sweet potato to broccoli to onion to cauliflower, plus garlic soy soba noodles with caramelized vegetables and a tempura egg.

The February 2011 Daring Cooks’ challenge was hosted by Lisa of Blueberry Girl. She challenged Daring Cooks to make Hiyashi Soba and Tempura. She has various sources for her challenge including japanesefood.about.com, pinkbites.com, and itsybitsyfoodies.com

The only problem I have with this month’s challenge is the ‘cold’ factor for the noodles.  I’m sorry, but we’ve been blasted with freezing cold weather and storm after storm, from snow to heavy rain, to freezing rain to sleet.  I don’t want cold noodles, I need some serious warmth.  This is why I decided to go against the challenge grain a bit and make myself a nice bowl of spicy, warm soba noodles, along with my spicy, warm tempura.

Wow, I’m already feeling toasty.

Shichimi Tempura Battered Poached Eggs

Tempura poached egg preparation: After all of the above; the egg is then deep-fried (20 seconds at 375°F), but as most of you know, I can’t give you deep frying photos because my kitchen has no windows outside of a tiny one on the door. 

First let me start with the tempura.  I decided to tempura batter what I order all the time.  My favorite tempura is sweet potato, broccoli, sweet onion, and asparagus.  I also decided to tempura batter a few poached eggs.

WHAT?

Yes, you can bread or batter a poached egg (or soft-boiled egg) and deep fry it.  I’m sure some think that there’s no way the hot oil won’t cook the yolk.  Two words, twenty seconds; that’s all it takes.  Of course you have to take great care in flouring and dipping the egg in the tempura batter. In other words, don’t use chopsticks to hold it; a slotted spoon is perfect.  I always wondered why those pubs that claim they can and will deep fry anything, have yet to attempt a poached egg.  Then again, maybe they have, but I’m always hoping to see it when I see them on TV deep frying candy bars and sneakers.How to make the best tempura! From sweet potato to broccoli to onion to cauliflower to eggs, plus garlic soy soba noodles with caramelized vegetables and a tempura egg.

SO, here’s another great thing about my tempura battered poached egg; Shichimi Togarashi.  I LOVE this spice so much.  I used it back in ’08 in the Lavash cracker challenge  (the same night I took a flying leap and annihilated my knee), and even made my own.

Shichimi Togarashi is 7-spice blend that usually includes red chile pepper, dried orange peel, white and black sesame seeds, Japanese pepper, nori, and ginger. However, sometimes poppy seed …wait, you can read about it HERE, and if you’d like, purchase it HERE.  You can also make your own, swapping in and out what you prefer.

How to make the best tempura! From sweet potato to broccoli to onion to cauliflower to eggs, plus garlic soy soba noodles with caramelized vegetables and a tempura egg.This was a deep fried pancetta bowl holding the noodles and egg.  It busted open just as I was about to snap the photo.  Figures.

With that said, I added a whole tablespoon of shichimi into the tempura batter for the poached eggs.  Yes, I made two batters, because I ended up using up my first batch (which was already doubled) on enough of the aforementioned veggies to feed a small country. It would have been well worth it if I had been able to like..umm..eat some of it without the building nausea wave ready to knock me off my surfboard.

How to make the best tempura! From sweet potato to broccoli to onion to cauliflower to eggs, plus garlic soy soba noodles with caramelized vegetables and a tempura egg.

Before I get to the soba, I have to mention that the tempura batter recipe provided to us by our lovely hostess is really good.  However, I prefer my old standby of rice flour and seltzer or beer because it stays crispier longer.

So here’s how I treated my soba noodles: I didn’t make the dashi dipping sauce (errr, soup.  I’m sorry, it’s a broth, not a dipping sauce), but instead I chose the spicy dipping sauce and used that to not only dip the tempura, but dress my noodles.  I added a bit of chili-garlic sauce to it because calling it spicy as is, is akin to calling a box turtle, fierce.  I topped it with sauteed red bell peppers, carrots, sesame oil fried spinach, green onions,  plus shredded cucumber and deep-fried pancetta.

You see, since I was topping some of the noodles with a poached egg, Eggs Benedict came to mind, so why not a little eggs Benedict fusion? It just seemed naked without some kind of pork product.  I actually tried to make a cup out of the pancetta to hold the soba and the poached egg, but unfortunately, my noodles busted it open and it broke, as you can see in the photos above.

How to make the best tempura! From sweet potato to broccoli to onion to cauliflower to eggs, plus garlic soy soba noodles with caramelized vegetables and a tempura egg.

Of course everyone had their choice how to have their soba, so only a poached egg and pancetta on request.  It was just as yummy with just veggies, as you can see directly above.

How to make the best tempura! From sweet potato to broccoli to onion to cauliflower to eggs!

For the recipes for tempura and soba, plus fantastic instructions and links, click HERE.

Warm Soba Noodle Vegetable Saute

One 8-ounce package soba (buckwheat noodles) or any noodles you prefer
1 tablespoon vegetable oil
1 tablespoon sesame oil
1 large red bell pepper, seeded and sliced very thin
|2 carrots, cut into 1 1/2-by 1/4-inch sticks (julienned)
3 scallions, sliced thin
3 cloves garlic, chopped
2 teaspoons grated or finely chopped ginger
1 bunch of regular or baby spinach, thoroughly washed and dried

If making cold soba noodles, instead of a warm saute, just slightly steam the vegetables, then cool and add some peeled, seeded and shredded cucumber. Keep chilled until ready to serve. Also, if making it cold, sometimes I also like to add crab, then mayo to the below dressing, similar to a Kani salad, but with noodles!

Dressing
2 tablespoons sesame oil
2 tablespoons tamari or soy sauce
2 tablespoons seasoned rice vinegar
1 teaspoon sugar
1/4 cup water

salt and pepper to taste
2 tablespoons sesame seeds, toasted lightly

DIRECTIONS:
1. In a large pot, bring 5 quarts salted to a boil. Add noodles and boil until al dente. Drain noodles in a colander and immediately rinse with cold water. In a large bowl toss noodles with 1 teaspoon sesame oil. Set aside.

2. Combine the remaining sesame oil, the rice vinegar sugar and the water in a measuring cup or small bowl. Set aside.

3. In a large non-stick skillet heat 1 tablespoon vegetable oil over moderately high heat. then add carrots and bell peppers. Saute until tender and slightly caramelized. Remove to a separate bowl. Now add the tablespoon of sesame oil to the skillet, and add ginger, garlic and scallions. Saute for 3 minutes, then add all the spinach at once, stirring and tossing until spinach is wilted.

4, Add the carrots and bell peppers back to the pan and let cook 1 more minute. Scrape the vegetable mixture over the noodles and toss well.

5. Pour the dressing into that same skillet, scraping up all the bits  of flavor stuck to the pan (the fond), and cook until slightly reduced and thickened. Immediately pour over noodle-vegetable mixture and toss well. Season with salt and pepper to taste.

6. Cover the bowl tightly with plastic wrap and  either let chill in the fridge for cold soba noodles, for several hours or overnight, or serve it immediately, hot or warm. However, you could chill it to let the flavors intensify overnight, then heat it up again before serving. Finally, you can also serve it room temp. After chilling, let it come close to room temperature then top with lightly toasted sesame seeds, if desired.

Garlic Soba Noodles with Caramelized Vegetables and Tempura Egg

Tempura Battered Poached Eggs (Poached Egg Tempura)

4 poached eggs
Well seasoned flour
Tempura batter from recipe linked at end of post, or one of your choice, with Shichimi Togarashi seasoning added.

DIRECTIONS:
1. Poach 4 eggs, then immediately slide into a bowl of ice water.  Cover and let chill while you make your tempura batter.

2. Heat 2 inches oil in a 3- to 4-quart heavy saucepan (about 1 1/2 inches deep) over high heat until deep-fat thermometer registers 375°F.

3. When ready to fry, gently blot any water from top of poached eggs with paper towels, then sprinkle each egg with salt and pepper and/or spice of your choice.

4. Carefully dredge 1 poached egg in flour, gently dusting off excess. Transfer egg to bowl of batter, spooning the batter over it to coat completely.  Lift it out gently with a slotted spoon, letting excess batter drip off. Gently lower spoon into oil and let egg slide off. fry for 20 seconds, then remove and place on a paper lined cooling rack. Repeat with remaining poached eggs, 1 at a time.

Bookmark and Share

Posted in Appetizers, Asian, Daring Cooks, Dinner, Pasta, Pork, Vegetables, Vegetarian | Tagged , , , , , , , , , , | 41 Comments

Biscuit Joconde Imprime Entremet – Peanut Butter and Chocolate all Decked Out

“You’re going to love the January Daring Bakers Challenge.”.

That’s what Lis, the co-founder of The Daring Kitchen, said to me one day last December.  I was tied up in cassoulet and confit, and a computer crash at the time, so the thought of baking anything was a welcome diversion, especially something I would love.

That being said, I’m very late in posting this; 4 days to be exact.

The freezer makes a great pause button.

Peanut Butter and Milk Chocolate Entremet

The January 2011 Daring Bakers’ challenge was hosted by Astheroshe of the blog accro. She chose to challenge everyone to make a Biscuit Joconde Imprime to wrap around an Entremet dessert.

On reveal day, I think I squealed.  An entremet! Plus, an entremet with a joconde and decor pattern paste (a decorative design baked into a light sponge cake providing an elegant finish to a variety of desserts, formed and filled in a ring mold)!! Add a ‘La’ and joconde is the French name for the Mona Lisa.  Umm, did she sponge off of people? Sorry, I had to…

Okay, let’s go back a little further.  Once a year (I think), the Food Network televises the World Pastry Championship.  I watch in awe as tall toque topped teams of pastry chefs, from many different countries, compete to hold this dubious distinction and honor. From the individual chocolates (bonbons and pralines) and plated desserts, to the sugar sculptures and chocolate showpieces, it’s all pretty mind-blowing. But, there’s one round that captivates me completely; the entremet.

Biscuit Joconde for Peanut Butter and Milk Chocolate EntremetA compilation of two of the three joconde imprimes I made.  Obviously, number three (bottom right) was the only one salvageable, the ‘spoon handle’ boring one.

These pretty cakes of mousse, creme, genoise, feuilletines disks, dacqouise, et al, are unbelievably stunning.  The flavors and fillings are always above and beyond any typical ingenuity, and I think I can safely say that they’re legitimate pieces of art.  Edible art, indeed, but masterful art in all genres. The chefs delicately paint intricate chocolate details and fold fluffy cream into mousses with the tenderest touch, but at the same time, brandish industrial strength electric spray guns and blowtorches like burly construction workers, but with a little more flair.

I digress.

I LOVE when pastry chefs find uses for the stuff you find at Home Depot or your local hardware store.  Joe, with the dirt under his nails, and half arm tan, standing behind Pierre in his Burberry jacket with buffed nails, both purchasing a blowtorch.

Digression over.

While one pastry chef blasts bombes of mousse with industrial sprays of chocolate and cocoa butter, another pulls hot sugar into perfect, delicate flowers, gently placing them atop the shiniest caramel mirror you ever did see.  This is heaven to me.

salted peanut dacquoise for Peanut Butter and Milk Chocolate EntremetSalted Peanut Dacquoise

Now, could I make an entremet that comes even a little close to those? Probably not, since my kitchen isn’t equipped with any electric spray guns, and I’m not equipped with those kind of skills, but, I do have acetate and chocolate transfer sheets! It’s like playing grown-up when you’re a child; I was going to the land of make-believe to take on the role of a French pastry chef.  Oui Oui!

Feuillitine insert for Peanut Butter and Milk Chocolate Entremet

Naturally, as you’ve all come to expect on this blog, a few things went wrong before I could start building my entremet.

SQUIRRELS ATE MY JOCONDE PASTE RIGHT OFF THE DANG SILPAT.

I’m dead serious.  Really.

Let me explain.  My freezer wasn’t freezing the design laden paste as hard as it needed to be, so, since we’ve been hammered with snow and freezing weather the past 2 weeks, I decided to cover the baking sheet with the paste and my hard-fought scraped out designs, and plant it on the snow outside.

An hour later I go to get it, and squirrels scatter, the top baking sheet covering pushed over and only a minuscule corner of chocolate paste swirl left.  Oh, but they did leave their mark, in the form of tiny, chocolate, squirrel paw prints across the silpat.  OKAY, I admit, I though about it for a nano-second, but only a nano-second.

Since when do squirrels like chocolate? Am I missing something here?

Peanut Butter and Milk Chocolate EntremetI really, really, really, REALLY wish I had  designed my joconde to match the chocolate transfer design on the hearts.  Simple loop-di-loop scribble scrabbles with the wood spoon handle, and the shoes would have matched the purse. But, after all the trouble with the joconde, I was just happy to get something out of it!

Surprisingly, I didn’t freak out, most probably because I had plenty of paste left over for another try. SO,  again, I carefully and painstakingly scraped out several designs, getting creative using biscuit cutters, a potato masher etc..; really, really pretty designs, mind you, into the paste. This one had to work!

After seeing that everything was frozen solid on the second shelf of my freezer; which was really too small for the baking sheet, I jammed the baking sheet in (Yep, jammed. When a baking sheet doesn’t fit, you find a way).  I ended up bending the corners of this particular sheet, but at this point, I didn’t care; I just wanted to get it done.  I went on to make the sponge, praying for ease, and thankfully, no snafu’s, no caveats, no problem! I spread the sponge on top of the design laden paste, and into the oven it went.  Everyone said the baking time in the recipe that was provided to us by our host, was way too long, as in crispy joconde edges, too long, as in..divide baking time in half too long.  I obsessed and only baked it 6 minutes, not wanting to inch even a little close to burnt spots since this sponge is all about the aesthetics, right?

Well, the damn sponge tore when I gently pulled the silpat off.  THUD.

Peanut Butter and Milk Chocolate Entremet

I had just enough paste left to make one more, but I had to make the damn sponge again. I was NOT spending time on intricate designs this time – so, Lisa meet wood spoon handle, wood spoon handle, meet Lisa.  Squiggle, squaggle, boring, ugly lines.  Good enough.

If that one didn’t work, I might have actually given up on one of my most favorite challenges ever.  It tore a little (I’ve come to the conclusion that I need new silpats, they’ve been used to the point of silicone revolt and retreat), but I had enough to line the mold.  I had to piece together more than one strip, but it wasn’t too bad.  Not my original vision, but, hey, it’s amazing how quickly things change when you have squirrels with refined palates.

Peanut Butter and Milk Chocolate Entremet

Now that I’ve taken up almost a whole page with squirrel sabotage and other disasters, on to the good stuff.  My original vision for my entremet was ‘exotic’ fruit, sort of leaning toward tropical.  In fact, I even made some of the components for that first vision, but a peanut butter- milk chocolate theme struck like lightning and I couldn’t let it go.  I kept recalling this amazing peanut butter and milk chocolate mousse parfait created by The Dessert Truck in NYC.  Let’s just say, if you’re a fan of peanut butter, this is one of those desserts that haunt your senses forever once you’ve tried it.

Initially, I was going to add a fruit gelee insert and/or topping to add a peanut butter and jelly aspect to the entremet, but then decided peanut butter and chocolate PLUS fruit gelee would sort of distract the palate.  I was feeling the contrast in texture, but not so much in flavor; I wanted pure peanut butter – chocolate goodness.  A shiny chocolate mirror was my last minute, final entremet decision, after mulling for days and days over fruit or caramel (remember when Greg Brady didn’t choose Marcia or his girlfriend for head cheerleader?).  Below are the components of my chocolate peanut butter entremet.

  • Biscuit Joconde
  • Milk Chocolate Ganache
  • Salted Peanut Dacquoise
  • Peanut Butter Milk Chocolate Feuilletine
  • Milk Chocolate Cremeux
  • Cocoa Genoise
  • Peanut Butter Mousse
  • Shiny Chocolate Mirror

I was all over the place as far as the amount of ingredients for each entremet component went.  I used base recipes, changed them around, and hoped it was the perfect amount without any leftovers.   However, the genoise and chocolate cremeux (set with gelatin, which is not usually the norm, but it needed to be to carry the weight of the other components.  It didn’t affect the texture in a negative way) did leave some leftovers, but is that really a bad thing? Cocoa genoise – chocolate cremeux parfaits!

Also, the peanut butter mousse is a little different in that the heavy cream is not whipped and folded in.  However, it’s so light and creamy, you would never know it.  As rich as this entremet sounds, it’s actually quite light and not too sweet.  Wait, how could I forget the finale?

‘Asbestos hands’ handmade caramelized sugar corkscrews, salted ground peanutty brittle (Equal parts sugar and water cooked to a light caramel.  Stir in ground salted peanuts and cook until the caramel is golden brown (the color in my photos).  Spread on a parchment or silpat lined baking sheet and cut before it sets completely, or break apart when set), and tempered chocolate, which I poured and spread on a transfer sheet of gold scribbles, then cut out hearts, hearts because this baby was made with L-O-V-E .  A dusting of cocoa, and voila, my first, complete entremet!

Peanut Butter and Milk Chocolate Entremet

By the way, below, can you tell which are the challenge recipes and which are not? I’m metrically stunted; conversions make me cringe.

Milk Chocolate – Peanut Butter Entremet with Joconde Imprime
Makes one 8 – inch round entremet; joconde makes more

*Joconde Sponge

YIELD: Two ½ size sheet pans or a 13” x 18” (33 x 46 cm) jelly roll pan

¾ cup/ 180 ml/ 3oz/ 85g almond flour/meal – *You can also use hazelnut flour, just omit the butter
½ cup plus 2 tablespoons/ 150 ml/ 2⅔ oz/ 75g confectioners’ (icing) sugar
¼ cup/ 60 ml/ 1 oz/ 25g cake flour *See note below
3 large eggs – about 5⅓ oz/ 150g
3 large egg whites – about 3 oz/ 90g
2½ teaspoons/ 12½ ml/ ⅓ oz/ 10g white granulated sugar or superfine (caster) sugar
2 tablespoons/ 30 ml/ 1oz / 30g unsalted butter, melted

*Note: How to make cake flour
*Cut out a 6 to 7 – inch circle of extra joconde, to use as a base to this entremet, which I forgot to do, so my bottom is the dacqoise.  Set aside, covered, or refrigerate, until ready to use.

Patterned Joconde-Decor Paste
YIELD: Two ½ size sheet pans or a 12” x 17” (33 x 46 cm) jelly roll pan

14 tablespoons/ 210ml/ 7oz/ 200g unsalted butter, softened
1½ cups plus1½ tablespoons/ 385ml/ 7oz/ 200g Confectioners’ (icing) sugar
7 large egg whites – about 7 oz / 200g
1¾ cup/ 420ml/ 7¾ oz/ 220g cake flour
Food coloring gel, paste or liquid

COCOA Décor Paste Variation: Reduce cake flour to 6 oz / 170g. Add 2 oz/ 60 g cocoa powder. Sift the flour and cocoa powder together before adding to creamed mixture.

Milk Chocolate Ganache
1/2 cup chopped milk chocolate
1/4 cup heavy cream

Salted Peanut Dacquoise
recipe by Nancy Olson via Food & Wine
1/3 cup sliced almonds
1/2 cup confectioners’ sugar
2 large egg whites
1 tablespoon granulated sugar
1/2 cup salted roasted peanuts, coarsely chopped

Milk Chocolate Peanut Butter Feuilletine
1/2 cup creamy peanut butter
2 tablespoons unsalted butter, softened
6 ounces good quality milk chocolate, chopped
1 cup paillete feuilletine (OR rice krispies, or corn flakes, or crushed sugar cones) Although I suggest corn flakes as an acceptable substitute for paillette feuilletine, the taste and texture are vastly different (they’re crushed french lace crepes called gavottes and are sweet with a caramel tone).  I purchased mine online, HERE.

Milk Chocolate Cremeux
1 1/2 teaspoons powdered gelatin or two leaves gelatin *
2 tablespoons water
1 cup milk
1 cup heavy cream
5 egg yolks
3 tablespoons sugar
3/4 cup good quality milk chocolate, chopped and melted

Cocoa Genoise
3/4 cup all-purpose flour
1 tablespoon dark cocoa powder
6 eggs
3/4 cup sugar
1/4 cup butter, melted
Cocoa simple syrup (1/2 cup each sugar and water cooked until sugar is dissolved, 1/2 teaspoon cocoa powder added and/or 1 tablespoon liqueur of your choice)

Peanut Butter Mousse
Inspired by the NYC Dessert Truck dudes

2 teaspoons powdered gelatin or about 2 1/2 leaves gelatin *
1/4 cup cold water
2 1/2 cups heavy cream
5 large egg yolks
5 tablespoons sugar
1/2 cup salted smooth peanut butter

Shiny Chocolate Mirror Glaze
4 oz sweetened condensed milk
6 oz semi-sweet or milk chocolate chocolate, chopped (I usually use 6 oz callebaut semi-sweet or milk chocolate calets)
3/4 cup sugar
4 oz water
1 tablespoon + 1/2 teaspoon powdered gelatin or 4 leaves of gelatin *
1/4 cup cold water
3 tablespoons cocoa powder
2 teaspoons  light corn syrup

FOR THE JOCONDE SPONGE:
1.In a clean mixing bowl whip the egg whites and white granulated sugar to firm, glossy peeks. Reserve in a separate clean bowl to use later.
2.Sift almond flour, confectioner’s sugar, cake flour. (This can be done into your dirty egg white bowl)
3.On medium speed, add the eggs a little at a time. Mix well after each addition. Mix until smooth and light. (If using a stand mixer use blade attachment. A whisk attachment is fine too, or by hand. )
4.Fold in one third reserved whipped egg whites to almond mixture to lighten the batter. Fold in remaining whipped egg whites. Do not over mix.
5.Fold in melted butter.
6.Reserve batter to be used later.

FOR THE JOCONDE PATTERN PASTE:
1.Cream butter and sugar until light and fluffy (use stand mixer with blade, hand mixer, or by hand)
2.Gradually add egg whites. Beat continuously.
3.Fold in sifted flour.
4.Tint batter with coloring to desired color, if not making cocoa variation.

FOR INSTRUCTIONS ON HOW TO PATTERN (you can make any pattern you like. This is just one example.) AND BAKE THE JOCONDE, CLICK HERE.

FOR THE MILK CHOCOLATE GANACHE:
Place the chopped chocolate in a stainless steel bowl. In a saucepan, heat cream over medium high heat until it just starts to boil. Immediately remove from heat and pour over chopped chocolate. Let sit for 2 minutes, then stir until uniform. Let sit until it reaches a soft, spreadable consistency.

FOR THE SALTED PEANUT DACQUOISE:
Trace a 7-inch circle onto a sheet of parchment paper and lay it on a baking sheet. In a food processor, pulse the almonds with the confectioners’ sugar until they’re finely ground. In a bowl, using an electric mixer, beat the egg whites at medium speed until soft peaks form. Add the granulated sugar and beat until the whites are stiff and glossy, about 2 minutes. Using a rubber spatula, fold in the almond mixture and 1/4 cup of the chopped peanuts. Spread the meringue on the parchment to fill the circle. Sprinkle the other 1/4 cup chopped peanuts on top. Bake for about 20 minutes, until lightly browned and firm. Turn oven off, prop the door open with a wood spoon, and let dry in the oven for about an hour or two.

FOR THE MILK CHOCOLATE PEANUT BUTTER FEUILLETINE:
In a medium bowl set in a saucepan of simmering water, heat the peanut butter with the butter and milk chocolate, stirring constantly, until smooth and melted. Remove from the heat and fold in pailette feuilletine. Spread the mixture on top of the salted peanut dacquoise. Transfer to the freezer and let cool completely.

FOR THE MILK CHOCOLATE CREMEUX:
Bring the milk and the heavy cream to a boil in a saucepan. Meanwhile, whisk together the yolks and sugar; temper the yolks into the warm milk-cream mixture. Cook the custard, whisking constantly, until it coats the back of a spoon and registers 182 degrees on a thermometer. Add the melted chocolate and mix with an immersion blender. Stir in the melted gelatin and let cool until it thickens somewhat.

FOR THE COCOA GENOISE:
Preheat the oven to 375°F. Sift together the flour and cocoa powder. Place a heatproof mixing bowl over a pot of gently simmering water, combine the eggs and sugar, whisking constantly, until the mixture is lukewarm. Remove the bowl from the simmering water, and whip until cool. Fold in the dry ingredients, and then fold in the melted butter. Pour the batter onto a Silpat-lined sheet pan and bake for 6 minutes, or until done. Cut out one 6 to 7-inch round.  Save the rest for other preparations, or just snack on it.

FOR THE PEANUT BUTTER MOUSSE:
In a bowl, dissolve the gelatin in the water and let stand for 5 minutes. In a saucepan, cook the cream over moderately high heat until it bubbles around the edge. In a medium bowl, whisk the egg yolks with the sugar. Gradually whisk the hot cream into the egg yolks. Pour the mixture into the saucepan and cook over moderately low heat, stirring constantly, until thickened, 3 minutes. Remove from the heat and whisk in the peanut butter. Melt the gelatin for 15 seconds in the microwave, then stir into peanut butter mousse base.  Let sit, stirring occasionally, until it thickens slightly.

FOR THE SHINY CHOCOLATE MIRROR GLAZE:
Sprinkle gelatin over 1/4 cup cold water. Let it stand at room temperature for 5-10 minutes.

Combine water and sugar in a saucepan, then bring to a boil, stirring until the sugar has dissolved. Remove saucepan  from heat. Add condensed milk and cocoa powder, then whisk to combine. Add the bloomed gelatin and stir to melt.

Place chocolate in a bowl. Pour the above mixture over the chocolate and stir constantly until the  chocolate is melted. Stir in corn syrup. Using an immersion blender, blend mixture until smooth. Strain through a fine mesh sieve into a clean bowl.

Let the glaze cool to a temperature of 91 to 94 degrees Fahrenheit. You need to use a candy thermometer to be exact. The warmer the glaze, the better, but do not exceed 94 degrees Fahrenheit. Pour glaze over entremet in springform pan, as you only want the glaze on top, not cover/enrobe the entremet.

ASSEMBLE ENTREMET:
1. Line an 8-inch cake ring or springform pan with acetate or parchment paper – make sure it’s at least 2-inches in height above the edge of cake ring or springform pan since the peanut butter mousse will spill over, if not.  Line with strip of biscuit joconde, cut about 1-inch shorter in height than the top of the cake ring.

2.Place the circle of joconde biscuit at the bottom of the cake ring.  Spread or pipe the biscuit with half the ganache then press the dacquoise disk on top of it. Spread  the rest of the ganache on top of the dacqouise disk and gently press the feuilletine disk on top of it. Pour partially set chcolate cremeux on top then freeze for about an hour.

3.  Remove entremet from freezer.  Brush both sides of the cocoa genoise with cocoa simple syrup then press on top of the chocolate cremeux.  Pour thickened peanut butter mousse on top of genoise. Freeze for another hour or two.

4.  Remove entremet from freezer and pour the shiny chocolate mirror slowly over the top.  Let set, then refrigerate until ready to serve.

*If using gelatin leaves instead of powdered gelatin (which I actually prefer), soak the leaves in cold water, then remove and squeeze dry when ready to add to recipe.

By the way, I just found out the Peanut Butter Exhibition is up and running again, so I couldn’t resist, and entered this entremet. Be sure to check it out and join up! Click the badge below to read about it and enter.

This entremet was definitely a challenge, but so enjoyable and well worth the awe appeal, taste and layers of deliciousness and  texture.  Surprise friends and/or family with one of these stunning works of art at your next holiday, birthday celebration, or dinner party! Au Revoir, until next time!


Posted in Cakes, Daring Bakers, Dessert, Puddings | Tagged , , , , , , , , , , , , , , , | 122 Comments

Cassoulet, Confit, and Exploding Sausages

Back in February of 2010, Lis asked me if I was into hosting a Daring Cooks challenge.  Of course, I said yes.  Of course, I said yes, YES, for the love of all things rich, comforting and well, artery clogging.  OK, artery clogging if eaten with any kind of regularity, but so worth maybe one temporarily clogged artery.  One “Help me get up, I can’t move” moment.

 How to make the best Cassoulet and Duck or Chicken Confit.

Time flies by so fast! Lis informed me that the next empty challenge slot was for January 2011; 11 months away, and it seemed like it would be forever, but BOOM, it’s here.  Why is it time moves so slow when you want to grow up, then speeds up considerably when you already are grown up (well, externally grown up.)?

I’ll always be a child at heart.

 How to make the best Cassoulet and Duck or Chicken Confit.

Our January 2011 Challenge comes from another blogger, and Me/Lisa from Parsley, Sage, Desserts and Line Drives. (what this blog used to be called prior to 2013). We have challenged the Daring Cooks to learn how to make a confit and use it within the traditional French dish of Cassoulet. I chose a traditional recipe from Anthony Bourdain and Michael Ruhlman.

 How to make the best Cassoulet and Duck or Chicken Confit.

Growing up aside, here’s the deal: We chose cassoulet for the challenge, along with a confit.  Most casssoulet does not call for duck confit, but since I also offered up a quick version and a vegetarian version ,we gave the cooks the choice of several vegetable confits and a chicken confit.  Wow, how could I forget the main challenge here? We chose both recipes, and yes, it’s time-consuming, a bit daring, and could be a little pricey with some hard to find ingredients.  Oh, don’t you just love us? We threw this at you guys two weeks before Christmas!! Be that as it may, spreading it out over 3 or 4 days actually makes it a somewhat simple dish to prepare.

 How to make the best Cassoulet and Duck or Chicken Confit.

When I think of cassoulet, there was always one I wanted to try; Anthony Bourdain’s.  I surfed around a bit, and found it on the Travel Channel site, from the No Reservations episode where he and Michael Ruhlman cooked up this amazing cassoulet for Michael’s family.  So, we gave you all a recipe that takes up about 4 days of your life, and again, don’t you just love us? But, I promise you, it’s so worth it! Then again, as mentioned above, we did offer other options, so I’ll stop repeating that.

Yes, I really will.

 How to make the best Cassoulet and Duck or Chicken Confit.

I made this cassoulet twice because my computer crashed, and I lost all the photos of the first cassoulet.  When I made the first cassoulet, I practically ate the whole pot myself, and paid dearly.  Walking became weight-lifting because I was almost full-term with a food baby.

You’re not supposed to eat almost a whole pot of cassoulet by yourself. Just thought I’d throw that out there.

The second time, I ate less, but it was even tastier because I made some great changes.  I know, I know, I made some changes to an Anthony Bourdain recipe that has been called the best cassoulet outside of France.  I think I broke a cooking law, but I refuse to succumb to the powers of the mighty Anthony Bourdain cassoulet that be. Well, sort of, since I still worship the ground that ‘anything’ Anthony Bourdain walks on!

 How to make the best Cassoulet and Duck or Chicken Confit.

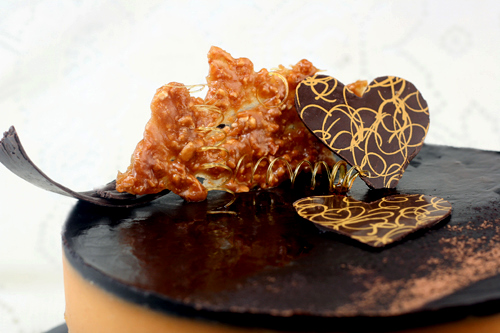
The first time around, I got great caramelization on the onion-pork rind combo, resulting in a flavorful, rich paste.  Second time, I omitted the pork rind and just used extra duck fat.  Not as caramelized.. as you can see by the color in the layering photo collage below.

Like I mentioned above, the reason I made it a second time after almost overdosing on duck fat, pork rind and pork belly, was because my computer crashed and I lost most of my step-by-step photos.  I also saw it as an opportunity to make the changes I felt would make it just a leeeettle more suited to my taste.  Fortunately, some of my photos were recovered, so this entry is an amalgamation of photos from two Bourdain cassoulet preparations. However, I’m not going to label each photo ‘First cassoulet! Second cassoulet!’; I promise.

 How to make the best Cassoulet and Duck or Chicken Confit.

The first time I made the cassoulet, I used whole chicken legs in place of the duck in Bourdain’s confit recipe.  I tried to sear them right out of the duck fat after cooking and chilling, and the skin melted off completely.  I still have no idea why that happened since the duck legs, for my second cassoulet, seared up beautifully with a golden brown, crisp skin

Culinary mysteries are annoying. BUT at the same time, intriguing.

 How to make the best Cassoulet and Duck or Chicken Confit.

With that said, here’s the changes I made to the second cassoulet: There was some serious caramelization needed on the pork belly and duck. Yes, crisping the skin of both prior to layering them beneath all the beans and liquid seems silly since you lose the crispiness beneath all of the liquid, but it really isn’t because you’re adding more flavor (from the caramelization of the skin) to the cassoulet.  In fact, not only did I sear the pork belly, I confit’d it (Is there a past tense for confit?) before searing and even before that, I brined it before confit’ing‘ (again, is there a word for this?) it.  It’s Thomas Keller’s recipe for pork belly confit from Ad Hoc at Home, in case you’re interested.  However, that’s a whole other entry because it needs to be an entry on its own.

To digress a bit, pork belly confit is a lead, not a supporting role, so it’s more than worthy of headlining and getting all the attention.  Pork belly confit in cassoulet is DeNiro in a minor role in a big movie co-starring Pacino as the duck, and Daniel Day Lewis as the sausage. The meaty roles, as expected.  No, I won’t dub the beans because I try to keep it somewhat nice here..somewhat!

 How to make the best Cassoulet and Duck or Chicken Confit.

Another change I made to my second cassoulet would probably irk Mr. Bourdain and many serious cassoulet lovers; those who would most definitely question my palate.  I omitted the pork rind lining.

Whaaaa??, you ask?

Reason number ONE: Since I couldn’t find a piece of pork rind, or even two for that matter, that made it easy to line the pot both ways without trimming and fitting some pieces in, I ended up with small and large floating bits of boiled pork skin all over the cassoulet upon serving.  I could not escape them, and frankly, did not want to eat them.

Reason number TWO: There was absolutely no flavor to the pork rind, and to be honest, it was kind of gross; raw and cooked.  Unless I’m lacking some serious taste buds, or the pig my skin came from just so happened to be fed a diet of JELLO, I’m sticking with my assertion that boiled pork rind sucks.  I truly believe the only thing you can do to pork rind/skin to make it edible is, get out the banjo, swing yer pardner round ‘n round, then deep fry it with lots of salt.  Serve with whatever fresh roadkill is available that day.

Yes, it’s a stereotypical joke pertaining to the movie Deliverance, not all the beautiful. brilliant and cultured people who happen to live in that area. But, the deep-frying part is not a joke.  Again, pork rind needs to be deep-fried!

 How to make the best Cassoulet and Duck or Chicken Confit.Not the most beautiful stew, but this is what cassoulet is all about.  It’s such a rich, chest-thumping, HE-MAN, soul stealing pot of meat and beans, that it needs to be attacked, errr served, with a big spoon, and just blobbed on a plate. Fork or spoon only necessary for the small bits. 

Finally, the sausages.  In the first cassoulet, I used plain pork sausage aka mild Italian sausage because that’s all I could kind find locally at the last minute.  The sausage was okay, albeit a little uninspiring. and it seemed so out of place among all the ‘to do’ in the cassoulet.  For the second cassoulet, sausages more suited to a cassoulet were available, so I picked up some duck sausage and garlic-sage sausage .  Everything seemed to be going great until about an hour into Day Two oven time.

POP, POP, POPPITY POP.

My beautiful duck sausages were exploding; they were in desperate need to escape from their casings.  I have no idea what caused it, (expanding fat?).  Perhaps I should have pricked them prior to searing or layering in the cassoulet? The garlic-sage sausage was so delicate that it kind of fell apart, so it was utter, aesthetic sausage fail.  Being a food blogger, I needed a whole sausage for photos, so I decided to go with one of the explosives.  Careful plating hides the split down the side, but I don’t know why it looks burnt, because it wasn’t.  Looks like my artificial lighting destroyed the caramelization, rather than my usual eff-ups.

Despite everything, both sausages were delicious.

Having said all that, my only regret is not adding some kind of garlicky, toasted bread crumb topping that I could keep breaking open during cooking to mix into the cassoulet, like my friend, Robert did.  Oh, well, after two cassoulets in about a month, and a possible need for an EKG, I think I’ll refrain for a little while.

 How to make the best Cassoulet and Duck or Chicken Confit.

I’d like to thank Anthony Bourdain, for a fantastic recipe, and Lis and Audax for everything else.  Since I’m only posting the recipe for Anthony Bourdain’s cassoulet, please go check out the other recipes for cassoulet, one being vegetarian, and one being a quick 30-minute cassoulet, by Jacques Pepin. PLUS, for some awesome confits that aren’t duck; chicken confit using olive oil in lieu of duck fat or lard, leek confit, and garlic confit.

Cassoulet and Confit

by Anthony Bourdain and Michael Ruhlman, (as featured on the Travel Channel’s ‘No Reservations’)

Preparation Time:
For Duck (or Chicken) Confit: 2 Days.
First day, 15 minutes.
Second Day, 2 hours.
For Cassoulet: 3 Days
First Day: 10 minutes, if that
Second Day: Approximately 3 ½ hours, most of which is oven time
Third Day: 1 ½ hours, all oven time

Ingredients for Duck or Chicken Confit
4 whole duck or chicken legs (leg and thigh), size does not matter
sea salt, for the overnight (at least 6-8 hours) dry rub (the amount varies depending on the size of your legs, so just know that you need to have enough on hand for a good coating.)
*2 cups/480 ml/450 gm/16 oz duck or chicken fat (you can use olive oil too)
a healthy pinch or grind of black pepper
4 sprigs of fresh thyme
1 sprig of fresh rosemary
1 garlic clove

Equipment:
Shallow dish
Plastic wrap
Saucepan
Ovenproof casserole
Foil

Day One
1.Rub the duck or chicken legs fairly generously with sea salt. Place in the shallow dish, cover with plastic and refrigerate overnight. At all times, keep your work area clean and your ingredients free of contamination – meaning don’t allow any other food, like bread crumbs or scraps, to get into your duck, duck fat or confit, as they will make an otherwise nearly non-perishable preparation suddenly perishable.

Day Two
1.Preheat the oven to moderately hot 375ºF/190ºC/gas mark 5.
2.Render (melt) the duck fat in the saucepan until clear. If using olive oil, no need to melt, obviously.
3.After seasoning with the black pepper, place the duck legs in the clean, ovenproof casserole.
4.Nestle the thyme, rosemary and garlic in with the duck legs, and pour the melted duck fat over the legs to just cover.
5. Cover the dish with foil and put in the oven. Cook for about an hour, or until the skin at the “ankle” of each leg pulls away from the “knuckle.” The meat should be tender.
6. Allow to cool and then store as is in the refrigerator, sealed under the fat. When you need the confit, you can either warm the whole dish, in which case removing the legs will be easy, or dig them out of the cold fat and scrape off the excess. I personally recommend the former. A nice touch at this point is to twist out the thighbone from the cold confit. Just place one hand on the drumstick, pinioning the leg to the table, and with the other hand, twist out the thighbone, plucking it from the flesh without mangling the thigh meat. Think of someone you hate when you do it.

*My notes –  If you’re going to store the duck confit for any significant amount of time prior to making the cassoulet, use 4 cups of fat so the legs are completely submerged and sealed.  Also, If you’re planning ahead, I would  recommend making the confit weeks or a month or so prior to the cassoulet since the longer they age, the better the flavor.

Ingredients for Cassoulet
5 cups/1200 ml/1100 g/39 oz dried Tarbais beans or Great Northern Beans or Cannelini Beans (if you use canned beans be aware that you will need double this amount!)
2 pounds/900 gm fresh pork belly
1 onion, cut into 4 pieces
1 pound/450 gm pork rind
1 bouquet garni (tie together two sprigs parsley, 2 sprigs thyme and one bay leaf)
salt and pepper
1/4 cup/60 ml/55 gm duck fat
6 pork sausages
3 onions, thinly sliced
1 garlic clove, thinly sliced
4 confit duck or chicken legs

Equipment:
Large bowl large pot
Strainer or colander
Sauté pan
Paper towels
Blender
Large, ovenproof earthenware dish
Measuring cup
Kitchen spoon

Day One
1.Place the beans in the large bowl and cover with cold water so that there are at least 2 or 3 inches (50mm or 75mm) of water above the top of the beans. Soak overnight. That was hard, right?  (Beans will double in size upon soaking, so use a big bowl!)

Day Two
1. Drain and rinse the beans and place in the large pot.
2. Add the pork belly, the quartered onion, 1/4 pound/115 gm of the pork rind, and the bouquet garni.
3. Cover with water, and bring to a boil. Reduce to a simmer and cook for about 30 minutes. Season with salt and pepper to taste and continue to simmer until the beans are tender, about 30 minutes more.
4. Let cool for 20 minutes, then discard the onion and the bouquet garni.
5. Remove the pork belly, cut it into 2-inch/5-cm squares, and set aside. (If you plan to wait another day before finishing the dish, wait to cut the pork belly until then.)
6. Strain the beans and the rind and set aside, reserving the cooking liquid separately.
7. In the sauté pan, heat all but 1 tablespoon/15 ml/15 gm of the duck fat over medium-high heat until it shimmers and becomes transparent.
8. Carefully add the sausages and brown on all sides.
9. Remove sausages and set aside, draining on paper towels.
10. In the same pan, over medium-high heat, brown the sliced onions, the garlic and the reserved squares of pork rind from the beans (not the unused pork rind; you’ll need that later).
11. Once browned, remove from the heat and transfer to the blender. Add 1 tablespoon//15 ml/15 gm of the remaining duck fat and purée until smooth. Set aside.
12. Preheat the oven to moderate 350ºF/180ºC/gas mark 4.
13.Place the uncooked pork rind in the bottom of a deep ovenproof non-reactive dish. You’re looking to line the inside, almost like a pie crust. Arrange all your ingredients in alternating layers, beginning with a layer of beans, then sausages, then more beans, then pork belly, beans, duck confit and finally more beans, adding a few dabs of the onion and pork rind purée between each layer.(Just pile, dab, stack and pile. It doesn’t have to be pretty.)
14. Add enough of the bean cooking liquid to just cover the beans, reserving 1 cup/240 ml in the refrigerator for later use.
15. Cook the cassoulet in the oven for 1 hour, then reduce the heat to very slow 250ºF/130ºC/gas mark ½ and cook for another hour.
16. Remove from the oven and allow to cool. Refrigerate overnight.

Day Three
1. Preheat the oven to moderate 350ºF/180ºC/gas mark 4 again.
2. Cook the cassoulet for an hour.
3. Break the crust on the top with the spoon and add 1/4 cup/60 ml of the reserved cooking liquid. Reduce the heat to very slow 250ºF/130ºC/gas mark ½ and continue cooking another 15 minutes, or until screamingly hot through and through. Then serve.

By the way, I would like to thank Hickory Farms via the FoodBuzz Tastemaker’s Program, for sending me a whopper of a sausage, cheese, cracker, mustard, candy gift box last December.  I’m not kidding when I tell you everything in the gift box was GONE within two days!  Loved it all, especially the pineapple mustard, which I wouldn’t let anyone else near.  Please go check out Hickory Farms for some great baskets, gift boxes etc, for yourself or to send to anyone for any occasion.


Bookmark and Share

Posted in Daring Cooks, Dinner, Lunch, Pork, Poultry, Soups/Stews | Tagged , , , , , , , , , , , , | 68 Comments